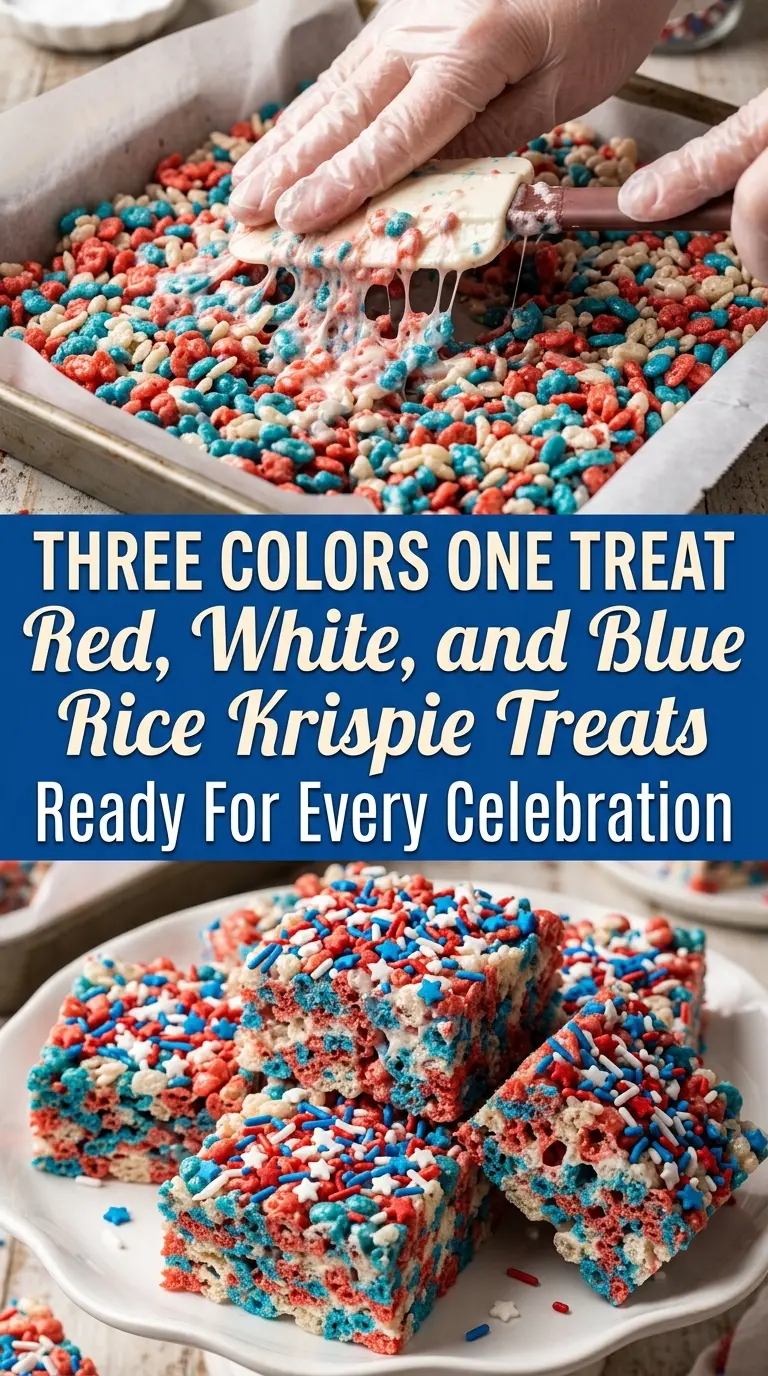
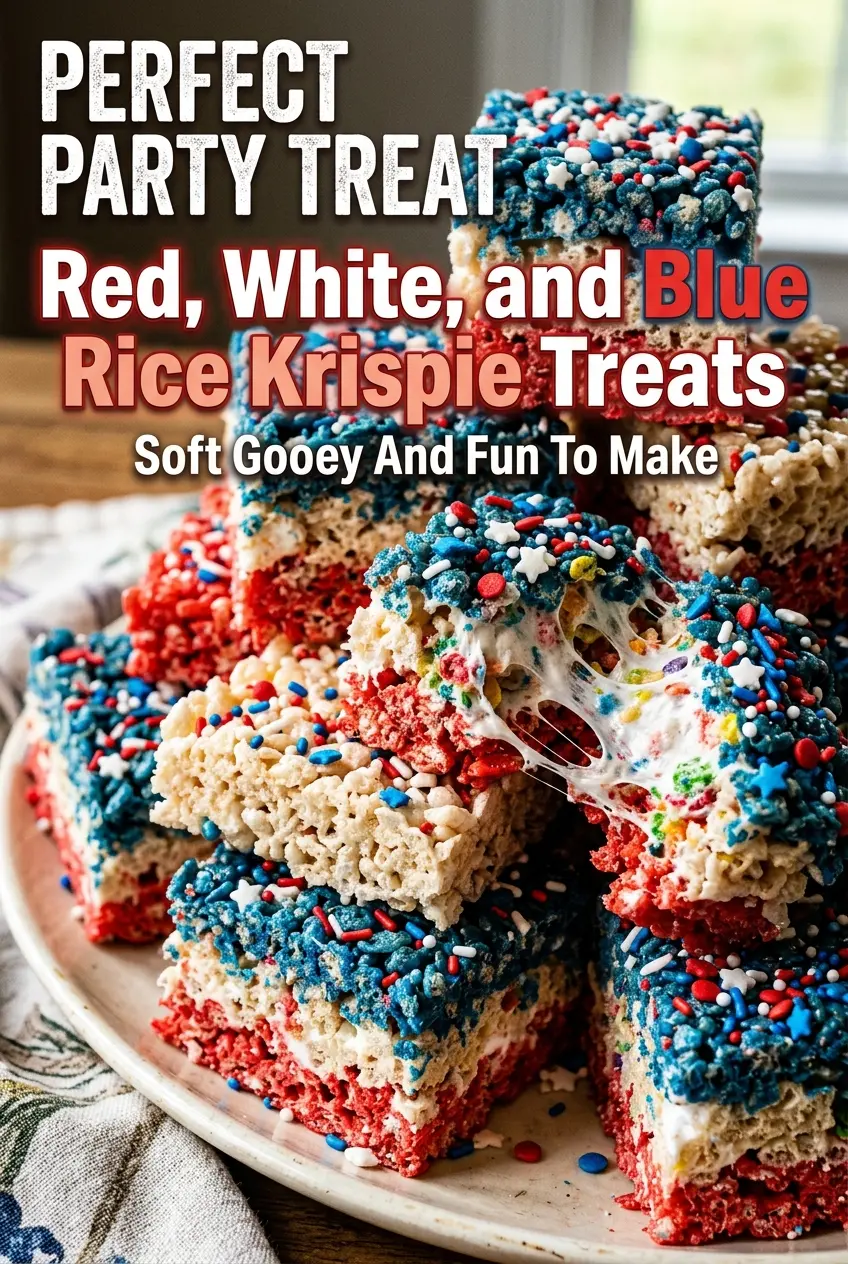
These Red, White, and Blue Rice Krispie Treats cut cleanly, stay gooey in the center, and bring a bright, cheerful look to the pan without turning into a sticky mess. The texture matters here: the marshmallow base stays soft enough to bite easily, but the cereal still gives each square that light crunch people expect from a good Rice Krispie treat. When they’re made right, the colors stay bold and the layers hold their shape long enough to make a real impression on the table.
The trick is keeping the marshmallows on low heat and dividing the mixture before adding the food coloring. That keeps the red and blue vivid without forcing you to overwork the cereal, which is how these treats turn dense and tough. I also like using gel coloring instead of liquid because it gives stronger color with less extra moisture, so the marshmallow mixture stays thick and easy to press into the pan.
Below, I’ve included the one part that matters most for clean layers, plus a few storage notes and substitutions that actually work if you need to adapt them for your own kitchen.
Bake, Serve, Wear the Vibe 👕
Editor-picked tees our Oven To Fork readers love.



We may earn from qualifying purchases at no extra cost to you.
The layers held their shape perfectly and the centers stayed soft instead of hardening up overnight. I used gel coloring like suggested and the red and blue came out bright without making the marshmallow mixture runny.
Bright, gooey Red, White, and Blue Rice Krispie Treats for a patriotic dessert tray that slices cleanly and disappears fast.
The Reason These Treats Stay Soft Instead of Turning Brick-Hard
Rice Krispie treats get tough when the marshmallows are overheated or the mixture is pressed down too aggressively. That’s the part most people miss. Low heat keeps the marshmallows smooth and stretchy, which gives you a tender bar instead of a stiff, compressed square.
The second thing that matters is handling the cereal gently once it’s in the bowls. Stir just until coated, then stop. If you keep mixing after the cereal is covered, the treats lose their airy texture and start to crush into a dense slab.
- Mini marshmallows melt faster and more evenly than large ones, which matters here because the mixture gets divided into three portions. If you only have large marshmallows, use the same weight and give them a little extra time over low heat.
- Gel food coloring gives bold red and blue without thinning the marshmallow base. Liquid coloring works in a pinch, but you’ll need more of it to get the same color, and that can make the mixture looser.
- Butter adds flavor and helps the marshmallow melt smoothly. Salted butter works if that’s what you have, though unsalted gives you a cleaner, sweeter finish.
- Rice Krispies cereal needs to stay crisp, so use fresh cereal from an unopened box if possible. Stale cereal won’t ruin the treats, but it does soften the snap and makes the bars feel flatter.
How to Layer the Colors Without Losing the Lines
Greasing the Pan First
Grease the 9×13-inch pan before you start the marshmallow mixture, not after. The mixture sets fast, and once it cools a little it starts grabbing onto anything it touches. A light coating of nonstick spray on the pan and on your hands or spatula keeps the layers from tearing when you press them in.
Melting the Base Gently
Set the butter over low heat and let it melt fully before the marshmallows go in. Add the marshmallows and stir until the mixture turns smooth and glossy, with no dry lumps left at the bottom of the pot. If the heat runs high, the marshmallows tighten up and the finished bars turn chewy in a bad way instead of soft and bouncy.
Coloring and Dividing the Mixture
Turn off the heat, stir in the vanilla, then split the marshmallow mixture into three bowls. Leave one white, tint one red, and tint one blue. Work quickly here because the mixture starts setting as soon as it leaves the pot, and gel coloring blends best while the marshmallow is still warm and pliable.
Pressing the Layers Into the Pan
Fold 2 cups of cereal into each bowl, then press the blue mixture into one-third of the pan, the white into the middle, and the red into the last section. Use lightly buttered fingers or a greased spatula and press just until the surface is even. If you compact the cereal too hard, the layers fuse into a dense block and lose that classic chewy lift.
Finishing and Cooling
Scatter the patriotic sprinkles over the top while the surface is still warm so they stick without extra pressure. Let the pan sit for about 30 minutes until the top is set and the bars cut cleanly. If you slice too early, the edges smear and the colored sections drag into each other instead of staying distinct.
Three Ways to Adapt These Patriotic Treats
Dairy-Free Version
Use a plant-based butter that melts cleanly and has a neutral flavor. The texture stays close to the original, though the bars may taste a little less rich. Choose a brand that behaves well when melted, because watery substitutes can make the marshmallow mixture loose.
Extra-Soft Treats
Add an extra cup of mini marshmallows to the pot if you want a softer, gooier bar. That gives you a sweeter, stretchier bite and helps the treats stay tender a little longer. The tradeoff is that they won’t hold razor-sharp edges as well when sliced.
No Gel Food Coloring
Liquid food coloring works, but start with just a few drops and build slowly. The color will be softer and you may need more than you expect, which can slightly loosen the marshmallow base. If the color turns pale, add a few more drops rather than dumping it all in at once.
Storage and Reheating
- Refrigerator: Store in an airtight container for up to 3 days. The bars firm up in the fridge, so the texture gets a little less pillowy.
- Freezer: These freeze well for about 6 weeks if wrapped tightly and stored flat. Thaw at room temperature, still wrapped, so condensation doesn’t make the tops sticky.
- Reheating: These don’t need reheating, but if they feel too firm, let them sit at room temperature for 15 to 20 minutes. Microwaving makes them collapse into a sticky mess, so skip it.
Answers to the Questions Worth Asking
Red, White, and Blue Rice Krispie Treats
Ingredients
Equipment
Method
- Grease a 9×13-inch baking dish with nonstick cooking spray so the bars release easily after cooling. Use a thin, even coat, especially along the corners.
- Melt the unsalted butter in a large pot over low heat for 5 minutes, stirring until mostly melted and smooth. Keep the heat low to avoid browning.
- Add the mini marshmallows to the pot and stir continuously for 3–5 minutes until completely smooth and glossy. Stop when no dry spots remain.
- Stir in the vanilla extract for 30 seconds until evenly incorporated. The mixture should look cohesive and silky.
- Divide the marshmallow mixture into three bowls. Each bowl should have a similar amount so the layers match.
- Leave one bowl white and keep it plain for the center section. Cover it briefly if it starts to firm up.
- Tint one bowl red and mix until the color is uniform. The mixture should be a consistent red throughout.
- Tint the other bowl blue and mix until the color is uniform. The mixture should be consistently blue with no streaks.
- Fold 2 cups Rice Krispies cereal into the blue bowl and stir until every flake is coated. Press the mixture gently to prevent dry cereal pockets.
- Fold 2 cups Rice Krispies cereal into the white bowl and stir until fully coated. The cereal should look evenly moistened.
- Fold 2 cups Rice Krispies cereal into the red bowl and stir until fully coated. The mixture should hold together when you press it.
- Press the blue mixture into the one-third section of the pan. Smooth the top with gentle pressure to create a tight layer.
- Press the white mixture into the center section. Spread it to the edges of the middle area so the layers are defined.
- Press the red mixture into the final section. Flatten the surface so the top is even.
- Add the red, white, and blue sprinkles over the top while the mixture is still warm and tacky. Aim for an even sprinkle layer so each bite has color.
- Let the treats cool for 30 minutes until set. They should feel firm and no longer glossy on top.
- Cut into squares and serve. For clean edges, use firm pressure and lift slices carefully from the pan.