Loaded oven baked nachos hit the table with the one thing stovetop nachos never quite manage: melted cheese in every corner without turning the chips into a soggy pile. The best trays come out with crisp edges, gooey cheese, and enough seasoned beef and beans to make every scoop feel intentional. When they’re built well, you get a little crunch, a little heat, and a bite that actually holds together long enough to get from pan to plate.
The trick is balancing weight and heat. Sturdy tortilla chips matter here because thin chips collapse once the beef and beans go on, and the cheese needs to be split between layers so it melts through the middle instead of sitting only on top. A quick simmer on the beef with taco seasoning and water helps the meat cling to the chips instead of drying out in the oven, which is the difference between nachos that taste seasoned and nachos that taste scattered.
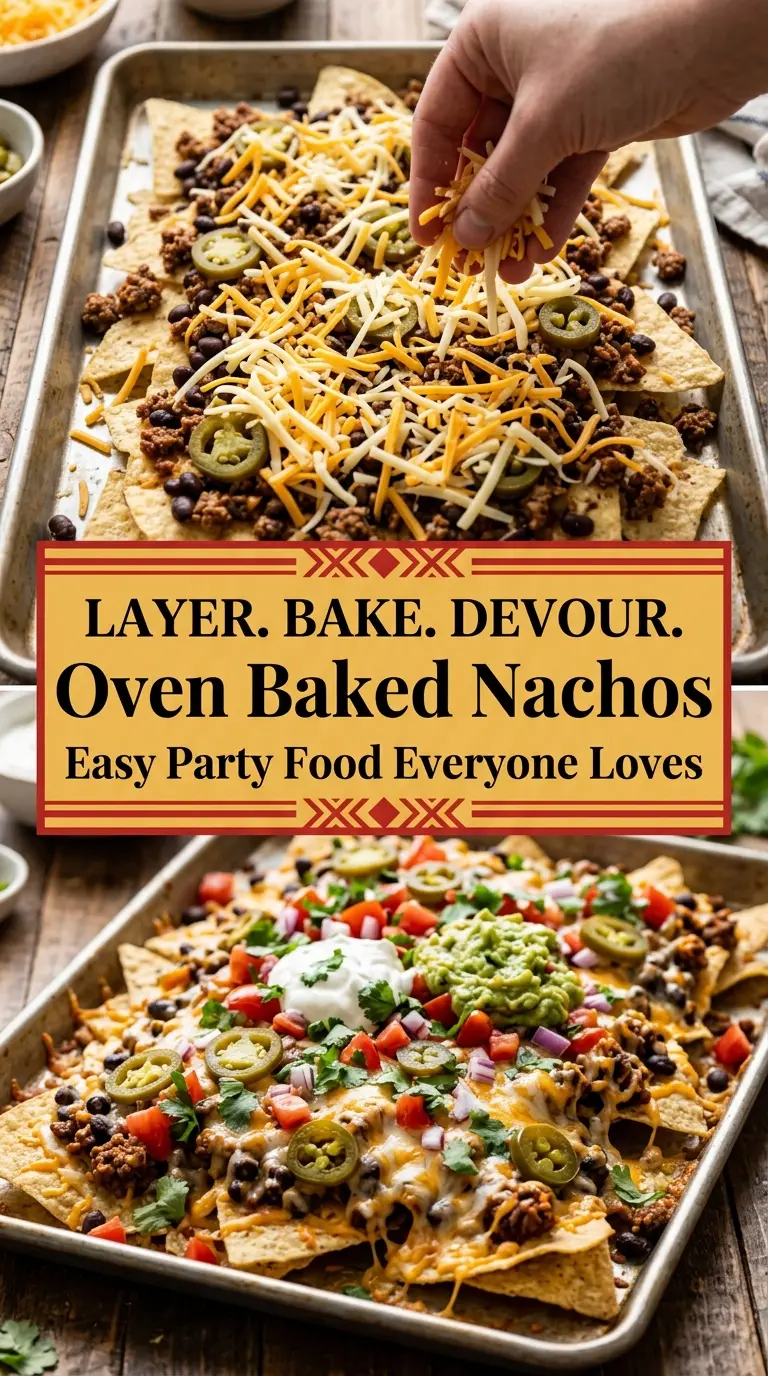
Below, I’ll walk through the parts that keep the chips crisp, how to layer the toppings so the tray bakes evenly, and the small finishing details that make each bite taste like you meant it.
Bake, Serve, Wear the Vibe 👕
Editor-picked tees our Oven To Fork readers love.


We may earn from qualifying purchases at no extra cost to you.
The chips stayed crisp under all that beef and cheese, and the layers melted together perfectly without getting greasy. I made it for game night and the pan was basically empty in ten minutes.
These loaded oven baked nachos are at their best right out of the oven with the cheese melted into the chips and the toppings piled on last.
The Reason These Nachos Stay Crisp Instead of Turning Soggy
The whole tray lives or dies by how much moisture you put on the chips. Wet toppings belong on top after baking, not under the cheese, and the beef needs to be cooked down until the pan looks just barely saucy, not loose or oily. If the meat mixture is too wet, it steams the chips before the cheese even has time to melt.
Layering matters more than people think. A single mountain of chips with everything dumped in the center leaves half the tray bare and the other half collapsed. Two thinner layers give you more contact between chips, cheese, and toppings, so each bite gets a little of everything without crushing the whole pan.
- Sturdy tortilla chips — Thin chips break under the weight of beef and beans. Choose a thick, restaurant-style chip that can handle a hot tray.
- Ground beef — This gives the nachos their hearty base. An 85/15 blend has enough fat for flavor without flooding the tray; if you use a fattier beef, drain it well.
- Cheddar and Monterey Jack — Cheddar brings sharp flavor, while Monterey Jack melts smoothly and helps the cheese blanket hold together. Pre-shredded cheese works, but freshly shredded melts more evenly if you have the extra minute.
- Black beans and corn — These add bulk and texture, but they should be drained and dried a bit before layering so they don’t add extra moisture.
What Each Ingredient Is Doing in the Pan
- Taco seasoning — This seasons the beef fast and gives the filling that familiar nacho taste. If your packet is salt-heavy, use a little less than the full amount and taste after simmering.
- Water — Just enough water helps the seasoning bloom and coat the meat instead of clumping. Let it cook off until the beef looks glossy and lightly sauced.
- Jalapeño — Sliced jalapeño adds sharp heat that cuts through the cheese. For less heat, remove the seeds; for more, leave them in or use pickled jalapeños for a brighter bite.
- Tomatoes, olives, avocado, cilantro, green onions, sour cream — These are the finishing layer, and they work best after baking. They add coolness, salt, and freshness, but they’d lose their texture if they went into the oven.
Build the Tray Hot, Not Heavy
Cook the Beef Until It Clings
Brown the ground beef over medium heat until there’s no pink left and the bits start to pick up color. Drain off the excess grease, then stir in the taco seasoning and water and let it simmer until the liquid reduces and coats the meat. If the mixture still looks soupy, keep cooking; wet beef is what turns chips limp before the cheese can protect them.
Layer the Chips and Fillings in Two Passes
Spread half the chips over a large baking sheet, then add half the beef, beans, corn, jalapeños, and cheeses. Repeat with the remaining ingredients so the tray doesn’t become one overloaded mound in the center. The goal is even coverage, not height, because a lower, wider layer bakes more consistently and gives you more chips that actually get toppings.
Bake Only Until the Cheese Melts
Slide the tray into a 400°F oven for 8 to 10 minutes, just until the cheese melts into glossy pools and the chips at the edges look lightly toasted. If you leave it in too long, the chips dry out before the toppings finish warming. Pull it the moment the cheese goes fully soft, then top immediately with the cold ingredients so you get contrast in every bite.
Three Ways to Make These Nachos Fit the Night
Make Them Gluten-Free Without Losing Crunch
Use certified gluten-free tortilla chips and check that your taco seasoning is gluten-free too. The method stays the same, and the texture should still land exactly where it should: crisp chips, melted cheese, and a sturdy base for the toppings.
Swap the Beef for a Lighter Filling
Ground turkey or chicken works well if you season it generously and cook it until it’s no longer watery. It won’t have quite the same richness as beef, so the cheese and toppings carry a little more of the flavor.
Go Vegetarian and Keep the Same Structure
Skip the beef and add an extra cup of black beans or use seasoned crumbled plant-based meat. The important part is keeping the filling fairly dry so the chips stay crisp under the cheese.
Storage and Reheating
- Refrigerator: Store leftovers in an airtight container for up to 2 days. The chips soften, but the flavors still hold up.
- Freezer: Not a great freezer recipe once it’s assembled. The chips lose their texture and the fresh toppings don’t thaw well.
- Reheating: Warm leftovers on a baking sheet in a 375°F oven until the cheese softens again. The microwave makes the chips rubbery, which is the fastest way to ruin the texture.
Answers to the Questions Worth Asking

Loaded Oven Baked Nachos
Ingredients
Equipment
Method
- Preheat the oven to 400°F (200°C) and set a large sheet pan inside to warm slightly while you prep.
- Brown the ground beef in a skillet over medium heat until no longer pink.
- Drain excess grease from the cooked beef.
- Stir in taco seasoning and water, then simmer for 2 minutes until thickened.
- Spread half the tortilla chips on the large baking sheet in an even layer for crisp edges.
- Add half the beef mixture, black beans, corn, jalapeños, and both cheeses over the chips so the center is well covered.
- Repeat with the remaining chips, beef mixture, beans, corn, jalapeños, and cheeses.
- Bake for 8–10 minutes, until the cheese is fully melted and bubbling with slight browning at the edges (visual cue: melted cheese pulls together).
- Remove the sheet pan from the oven and let it cool for 1–2 minutes so toppings don’t melt immediately.
- Top the nachos with diced tomatoes, sliced black olives, avocado, chopped cilantro, and green onions in a colorful layer.
- Drizzle or dollop sour cream over the top and serve immediately while the chips stay crisp.