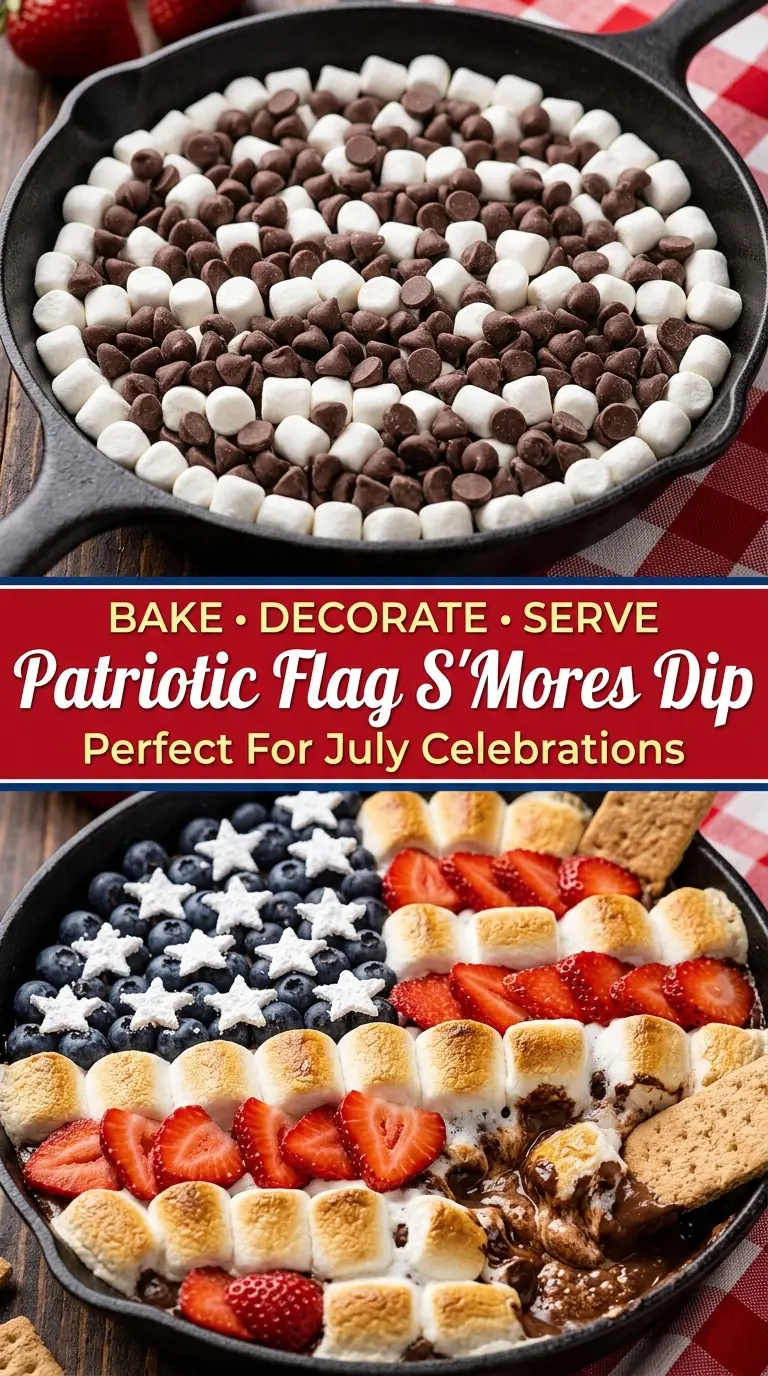
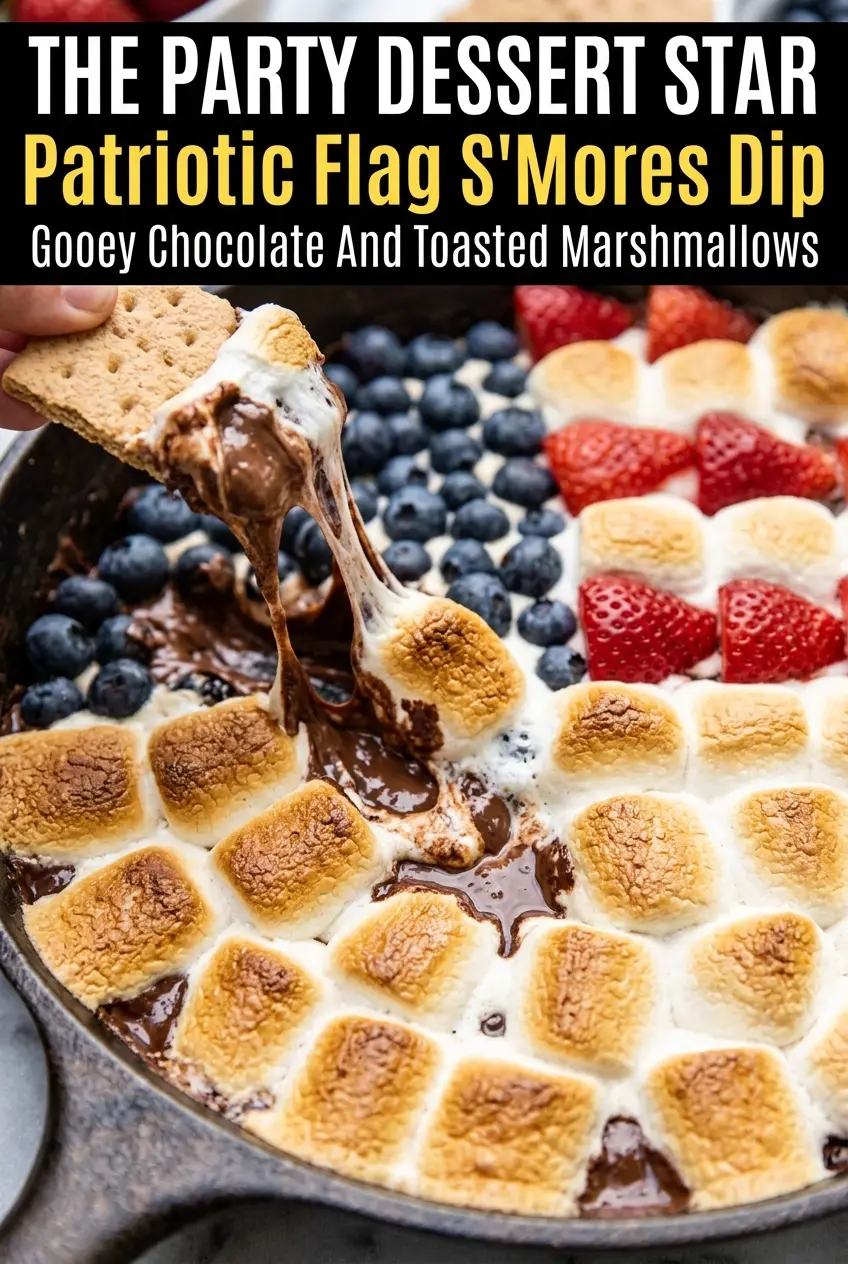
Melted chocolate, toasted marshmallows, and a bright red, white, and blue finish turn a simple skillet dessert into the kind of party tray people hover around until the last cracker is gone. The contrast is what makes it work: the chocolate stays soft underneath, the marshmallows blister and collapse into gooey pockets, and the berries cut through all that sweetness with a fresh bite. It looks festive on the table, but it also earns its place because it tastes like an actual s’more, just without the fire pit.
The trick is layering the chocolate in an even bed so it melts before the marshmallows overbake, then pulling the skillet the moment the tops are deeply golden. If you wait for all of the marshmallows to brown evenly, the ones around the edge will start to dry out before the center is ready. The fruit goes on after baking, not before, so the flag stays crisp, colorful, and easy to serve.
Below, I’ll walk through the small details that keep the dip gooey instead of greasy, plus a few easy ways to adapt it for a bigger crowd or a different serving pan.
Bake, Serve, Wear the Vibe 👕
Editor-picked tees our Oven To Fork readers love.


We may earn from qualifying purchases at no extra cost to you.
The chocolate melted into a perfect layer and the marshmallows browned in just a few minutes. I loved that the berries went on after baking so the flag stayed neat and the whole pan wasn’t soggy.
Patriotic Flag S’Mores Dip brings gooey chocolate, toasted marshmallows, and fresh berries together in one skillet — perfect for a festive dessert that disappears fast.
The Marshmallow Layer That Keeps the Chocolate Soft
The mistake with skillet s’mores dip is piling on a thick layer of marshmallows and baking until every top is dark brown. That looks dramatic for about ten seconds, then the edges start to toughen and the chocolate underneath can seize into a grainy layer. A single even layer is enough. The marshmallows puff, toast, and slump into the chocolate without turning the whole pan into a dry, sticky mass.
Cast iron helps here because it holds heat long enough to keep the dip molten at the table. If you use a ceramic or glass dish, the chocolate sets faster and you lose some of that stretchy, spoonable texture. The other thing that matters is the bake time. Pull it when the tops are golden and a few spots are browned, not when every marshmallow has fully collapsed.
What Each Ingredient Is Actually Doing in This Dish
- Milk chocolate chips — These give you the classic s’mores sweetness and a soft, scoopable base. They melt smoothly and stay loose under the marshmallows. If you want a richer result, use part milk chocolate and part semi-sweet, but don’t go all the way dark unless you want the berries to stand out more than the chocolate.
- Semi-sweet chocolate chips — This keeps the dip from tasting flat. The slight bitterness balances the marshmallows and strawberries, which matters once the dish is warm and sweet all the way through. A chopped chocolate bar works too, but chips are convenient and melt evenly enough for this purpose.
- Large marshmallows — These are what give you the toasted top and the stretchy, gooey pull. Mini marshmallows don’t cover the pan as neatly and can brown too fast. If the marshmallows are crowded in uneven piles, the center stays pale while the edges overcook, so lay them in a single layer from the start.
- Blueberries and strawberries — These aren’t just decoration. The berries add freshness and the flag pattern makes the whole pan look finished without any extra work. Pat the strawberries dry after slicing so their juice doesn’t bleed into the marshmallows.
- Graham crackers and pretzel sticks — Grahams give you the classic s’mores bite, while pretzels bring salt and crunch. Both hold up better than soft cookies, which collapse once they hit the warm chocolate.
Baking the Skillet So the Center Stays Gooey
Building the Chocolate Base
Scatter the chocolate chips in an even layer across the bottom of the skillet. Gaps are fine, but big piles aren’t, because mounds of chips melt unevenly and leave you with hot spots and dry patches. The goal is a soft base that turns glossy and fluid under the marshmallows. If your skillet is smaller than 10 inches, the dip will be thicker and need a minute or two less in the oven.
Toasting the Marshmallows Without Drying Them Out
Arrange the marshmallows over the chocolate in one layer and bake at 425°F until the tops are deeply golden, usually 6 to 8 minutes. Watch the color, not the clock. If the marshmallows are pale, they’ll taste raw; if they go too far, they stiffen as they cool and the dip loses its pull. Pull the skillet when the centers still look soft and puffed.
Adding the Flag After the Bake
Wait a minute after the skillet comes out before placing the berries on top. That short pause keeps them from sinking into the marshmallows and helps the design stay sharp. Build the blueberry square in the upper corner first, then lay the strawberry slices into stripes. If you add the fruit too soon, the marshmallow surface shifts and the pattern slides around.
Make It With Dark Chocolate
Swap half or all of the milk chocolate for semi-sweet or dark chocolate if you want a less sweet dip. The marshmallows and berries still bring plenty of sweetness, but the finish will taste deeper and a little more grown-up. This version works best if your crowd likes a stronger chocolate edge.
Gluten-Free Serving Board
Use gluten-free graham-style crackers or sturdy gluten-free cookies in place of standard grahams. The dip itself is naturally gluten-free, but the dippers matter here because soft cookies will break under the warm chocolate. Pretzel sticks are only an option if you buy a certified gluten-free version.
Extra-Festive Berry Swap
Raspberries can replace part of the strawberries if you want a sharper, more tart bite. They won’t give you the same striped look unless you slice them carefully, but they add brightness that cuts through the sweetness. Keep the blueberries for the flag pattern so the design still reads at a glance.
Storage and Reheating
- Refrigerator: Best eaten right away. Leftovers keep for 1 day, but the marshmallows turn firm and the berries release juice.
- Freezer: Not a good freezer dessert. The marshmallows and berries change texture too much after thawing.
- Reheating: Warm leftovers in a low oven until just softened again. Microwave reheating makes the marshmallows rubbery and pushes the chocolate toward an oily texture.
Questions I Get Asked About This Recipe
Patriotic Flag S'Mores Dip
Ingredients
Equipment
Method
- Preheat oven to 425°F (220°C). Make sure the oven is fully heated before baking.
- Spread milk chocolate chips and semi-sweet chocolate chips evenly into a 10-inch cast iron skillet. Aim for a uniform layer so it melts smoothly.
- Arrange large marshmallows over the chocolate in a single layer. Keep gaps minimal so the surface toasts evenly.
- Bake for 6–8 minutes until marshmallows are golden. Look for tops that are lightly browned and slightly puffed.
- Remove from oven carefully. Set on a heat-safe surface to avoid scorching the skillet or toppings.
- Create an American flag design using blueberries in the upper corner. Keep the berries clustered to form a clear blue field.
- Arrange sliced strawberries into horizontal stripes. Place them evenly across the surface for a neat red stripe pattern.
- Serve immediately while warm. Add graham crackers and pretzel sticks for dipping and enjoy right away.