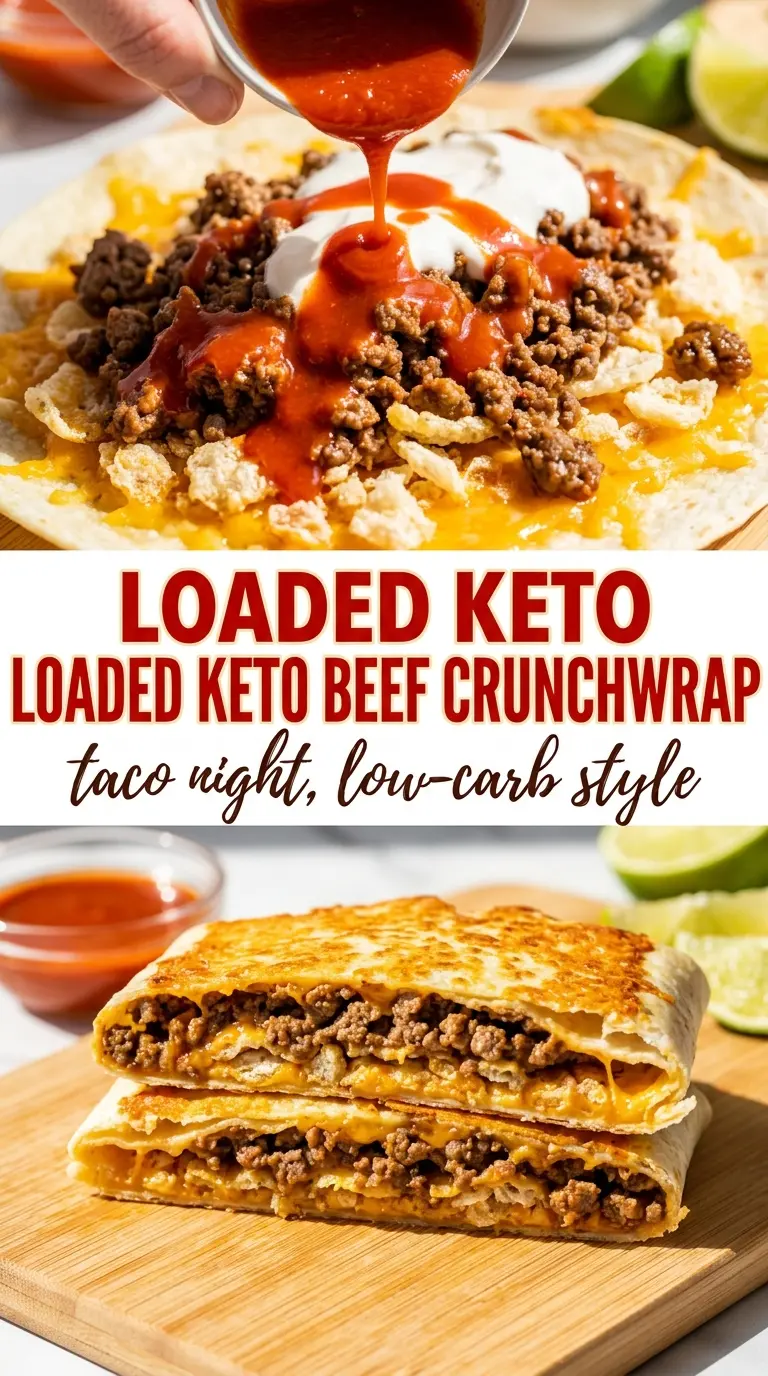
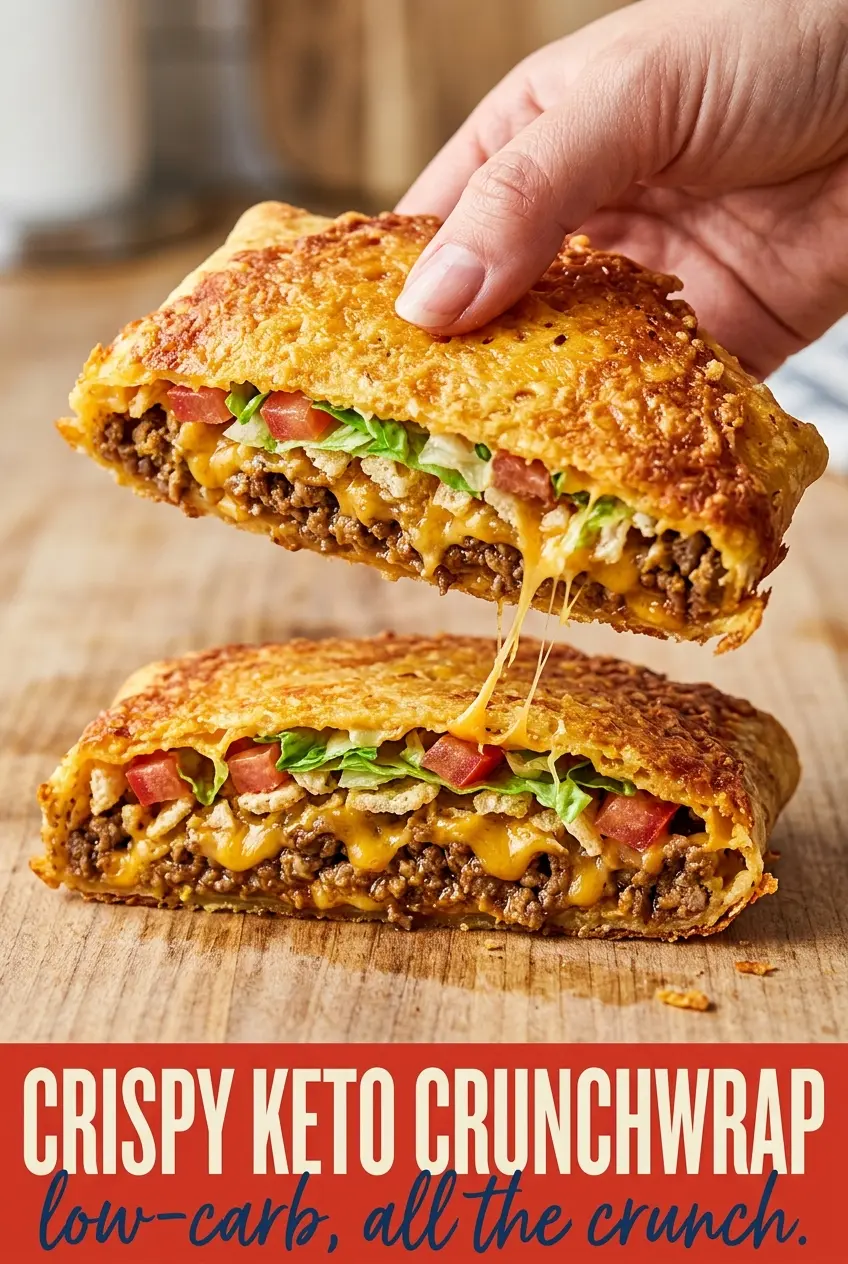
Golden on the outside, cheesy where it counts, and packed with seasoned beef and crunchy layers, this keto crunchwrap has the kind of texture you miss when you cut the carbs too far. The cheese shell gets crisp in the skillet and holds together just long enough for that first messy, satisfying bite. It eats like a fast-food treat, but it feels sturdier and a lot more homemade.
What makes this version work is the cheese wrap. Low-moisture mozzarella melts into a thin, flexible round if you give it a minute to fully set before moving it, and that set-up is what lets you fold it without tearing. The other key is keeping the filling compact and not overstuffing the center; if the pile gets too tall, the seams pop open when the wrap goes back into the skillet.
Below, I’ll walk you through the part that matters most: how to get the cheese shell crisp without turning it brittle, plus a couple of smart swaps if you want to change up the filling or make it dairy-free.
Bake, Serve, Wear the Vibe 👕
Editor-picked tees our Oven To Fork readers love.


We may earn from qualifying purchases at no extra cost to you.
The cheese shell browned up beautifully and held together better than I expected. I kept the filling in the center like you said, and the crunch from the pork rinds made it taste just like the real thing.
Save this keto crunchwrap for the nights when you want that crisp cheese shell, seasoned beef, and all the taco-shop layers without the tortillas.
The Trick Is Getting the Cheese Wrap Flexible, Not Fried
The biggest mistake with a keto crunchwrap is rushing the cheese wrap. If you try to lift it too soon, it tears. If you cook it until it’s stiff and deeply browned, it cracks when you fold it. The sweet spot is when the mozzarella has melted into a single thin layer and the edges release from the pan with a little color underneath, but the center still bends instead of snapping.
That’s why low-moisture mozzarella matters here. It melts into a workable sheet without turning greasy, which gives you enough structure to fold around the filling. A fresh mozzarella or a softer blend won’t hold the same way, and it usually gives you a wetter, weaker wrap that falls apart before you can crisp it.
- Low-moisture mozzarella — This is doing the job that a tortilla normally would. Shredded mozzarella melts evenly and sets into a flexible shell once it cools for a moment. Pre-shredded cheese works, but if you shred it yourself, it melts a touch more smoothly because there’s less anti-caking starch in the pan.
- Ground beef — An 80/20 blend brings enough fat for flavor, but not so much that the filling turns greasy. If you use leaner beef, the seasoning still works, but the result tastes a little drier unless you keep the simmered sauce thick and juicy.
- Pork rinds — These stand in for the tostada crunch layer. Crush them lightly, not into dust, so you still get some texture in the bite. If they’re ground too fine, they disappear into the beef and lose the whole point of the layer.
- Sour cream and hot sauce — Stir these together before assembly so the cream spreads instead of sitting in one cold pocket. That little step keeps the filling balanced and stops the center from feeling dry against the cheese shell.
The 20 Minutes That Matter Most
Brown the Beef First
Cook the ground beef over medium-high heat and break it up as it cooks so you get fine crumbles instead of big chunks. You want the meat no longer pink and any moisture in the pan mostly cooked off before you season it, because a wet filling makes the wrap soggy. If there’s a lot of fat in the skillet, drain it off before adding the taco seasoning.
Thicken the Filling, Don’t Leave It Loose
Once the seasoning and water go in, let the mixture simmer until the liquid reduces and clings to the beef. It should look glossy and spoonable, not soupy. If you stop too early, the filling runs toward the seam and makes the cheese shell slip open when you fold it.
Cook the Cheese Shell With Patience
Sprinkle the mozzarella into a thin circle in a nonstick skillet and let it melt undisturbed. The edges should turn lightly golden before you try to move it, and the center should look unified rather than shredded or lumpy. Slide it onto parchment as soon as it’s ready, then work while it’s still warm and flexible.
Fold, Then Crisp Seam-Side Down
Put the filling in the center and keep it in a compact mound so you have enough cheese around the edges to pleat upward. Once folded, press the seam lightly and place it seam-side down in the skillet first. That first side sets the shape and seals the edges; if you flip it too early, the wrap can open before the cheese has time to firm up.
How to Change This Up Without Losing the Crunch
Dairy-Free Version
Swap the cheese shell for a low-carb tortilla if dairy is off the table, then crisp the wrap in a dry skillet until it develops a little color. You lose the extra rich, salty chew of the mozzarella shell, but you keep the layered crunch and the handheld shape.
Chicken Instead of Beef
Use cooked shredded chicken or browned ground chicken with the same taco seasoning and water. Chicken gives a lighter filling and picks up the hot sauce well, but it needs a little more seasoning than beef to taste full-bodied.
Extra-Crunch Taco Style
Keep the pork rinds a little larger and add them right before folding so they stay crisp. If they sit under the warm beef too long, they soften fast, so this version works best when you assemble and cook right away.
Storage and Reheating
- Refrigerator: Store leftovers for up to 2 days. The cheese shell softens as it sits, but the flavor still holds up well.
- Freezer: I don’t recommend freezing this one. The lettuce, tomato, and sour cream change texture, and the cheese shell turns uneven when thawed.
- Reheating: Reheat in a dry skillet over medium heat until the outside crisps again and the center is hot. The microwave will warm it, but it turns the shell rubbery and the crunch layer disappears.
Questions I Get Asked About This Recipe
Keto Crunchwrap
Ingredients
Equipment
Method
- Brown ground beef in a skillet over medium-high heat, breaking it up, 5–6 minutes until no longer pink; drain excess fat for a cleaner finish.
- Add taco seasoning and water to the beef, then stir and simmer 2–3 minutes until thickened and well coated, stirring until the mixture looks glossy.
- Sprinkle 1 cup mozzarella into a thin, even 8-inch circle in a nonstick skillet over medium heat, cooking 3–4 minutes until melted, golden, and set.
- Carefully transfer the finished cheese wrap to parchment paper, letting it rest just long enough to firm before repeating with the second wrap.
- While the cheese wrap is still warm and pliable, layer the center with seasoned beef, crushed pork rinds, and cheddar cheese.
- Spoon sour cream mixed with hot sauce over the fillings so it spreads slightly, creating a creamy layer.
- Add lettuce, diced tomato, pickled jalapeños, and chopped cilantro on top, packing lightly so the wrap can still fold.
- Fold the edges of the cheese wrap up and over the filling toward the center, pleating as you go to fully enclose it, pressing gently to seal.
- Place the folded crunchwrap seam-side down in a hot, lightly oiled skillet and cook 2–3 minutes per side until golden and crisp, with the internal temp of the beef holding above 140°F.
- Let rest 1 minute, then slice in half and serve immediately while the cheese shell is crisp.