Jammy blueberries bubbling up through a tender, buttery biscuit top is the kind of dessert that disappears before it’s even cooled. The best blueberry cobbler doesn’t need a long ingredient list or any fussy layering tricks; it just needs a batter that rises around the fruit and bakes into a crisp-edged, golden crust with a soft center that catches every spoonful of syrupy filling.
What makes this version work is the contrast. The melted butter sits in the pan first, so the batter can bake into a more biscuit-like bottom edge instead of turning cakey. The blueberries are lightly tossed with sugar, lemon juice, and zest before they go in, which keeps the filling bright and helps the fruit release just enough juice to turn glossy and thick in the oven. Fresh berries are great, but frozen work just as well because they hold their shape and make their own sauce as they bake.
Below you’ll find the little details that matter most: how to keep the topping tender instead of tough, how to handle frozen berries without watering everything down, and a couple of easy swaps if you want to adjust the fruit or make the cobbler dairy-free.
Bake, Serve, Wear the Vibe 👕
Editor-picked tees our Oven To Fork readers love.


We may earn from qualifying purchases at no extra cost to you.
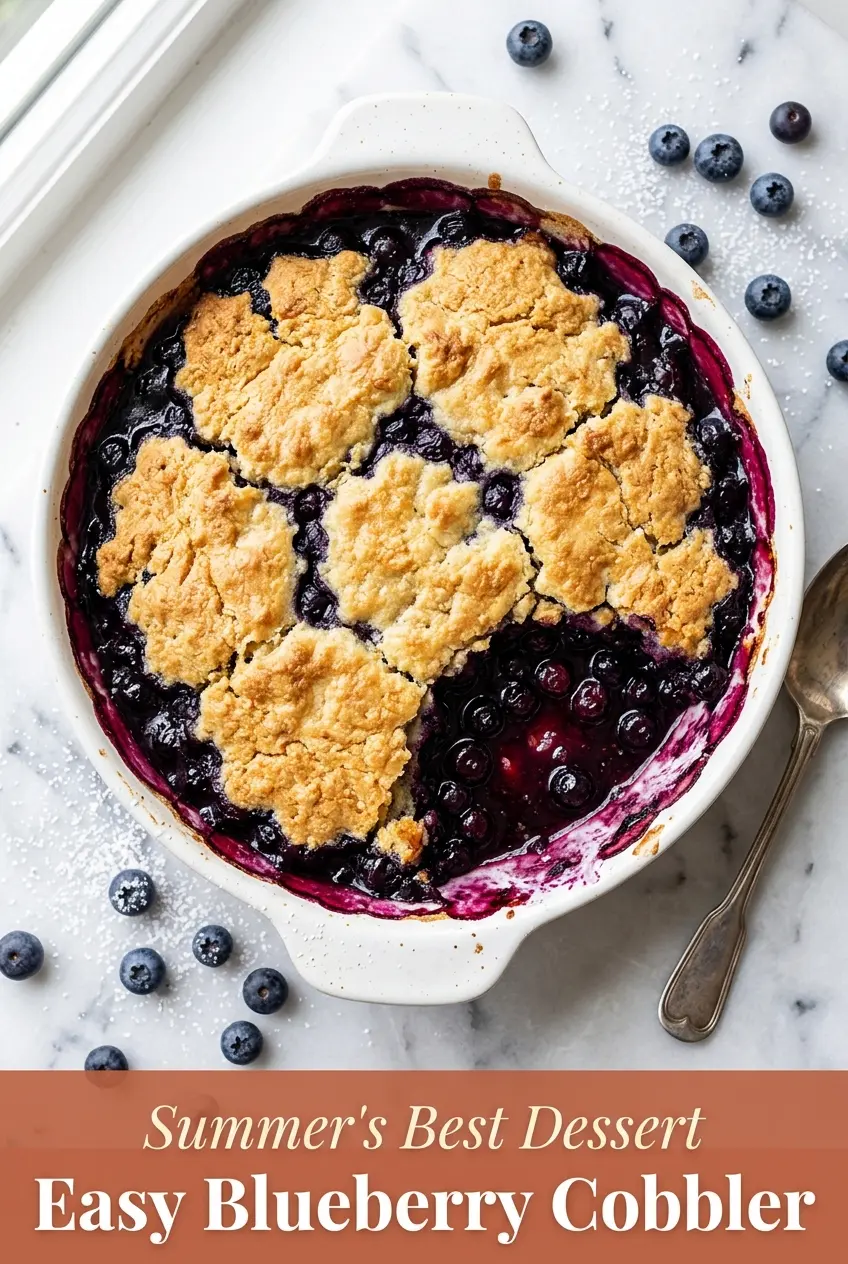
The berries turned syrupy and the top baked up golden with crisp edges, just like the cobbler I remember from my grandma’s kitchen. I used frozen blueberries and it still set up beautifully after resting for 10 minutes.
Save this blueberry cobbler for the nights when you want bubbling fruit, a buttery biscuit topping, and dessert in one baking dish.

The Reason Blueberry Cobbler Stays Juicy Instead of Watery
The difference between a cobbler that turns spoonable and one that turns soupy usually comes down to two things: how much liquid the fruit gives off and whether the topping can bake fast enough to set before that liquid takes over. Blueberries already carry a lot of juice, so adding sugar and lemon draws it out on purpose. That juice becomes the sauce. The goal is not to dry the berries out. It’s to keep the filling concentrated enough that it bubbles thickly at the edges instead of flooding the pan.
The other part is the batter. Pouring it over melted butter gives you pockets of crisp, buttery edges as it bakes, but stirring the layers together kills that structure. If the cobbler looks a little messy before it goes in the oven, that’s fine. Messy is what lets the fruit sink in just enough while the top still rises around it.
- Blueberries — Fresh or frozen both work. Frozen berries don’t need to be thawed first, and that’s often the better choice because they hold their shape. If you do use very large berries, expect a slightly looser filling and bake until the juices are actively bubbling.
- Lemon juice and zest — These don’t make the cobbler taste lemony; they keep the blueberries from tasting flat. The zest carries most of the aroma, while the juice sharpens the fruit. Bottled lemon juice works in a pinch, but fresh zest is where the lift comes from.
- Butter — Melted butter is what gives the crust those crisp, fried-looking edges against the pan. Use real unsalted butter here. If you swap in margarine or a neutral oil, you lose that rich browning and the topping tastes more like quick bread than cobbler.
- Milk — Whole milk gives the batter enough fat to stay tender. Lower-fat milk works, but the crumb comes out a little drier. For dairy-free cobbler, use full-fat oat milk; it keeps the batter soft better than almond milk.
The 20 Minutes That Decide the Texture
Building the Fruit Layer
Toss the blueberries with the sugar, lemon juice, and zest until every berry looks lightly glossed. You want the sugar to start drawing out juice before the pan even goes in the oven. If you skip this, the filling often bakes up unevenly, with dry pockets and a thin syrup around the edges. Let it sit while you mix the batter so the juices have a minute to collect.
Mixing the Batter Without Toughening It
Whisk the dry ingredients first so the baking powder is evenly distributed, then stir in the milk and vanilla only until the flour disappears. A few small lumps are fine. Overmixing develops gluten and gives you a rubbery top instead of a tender biscuit crust. The batter should look thick but pourable, like a loose pancake batter.
Layering Without Stirring
Pour the batter directly over the melted butter in the baking dish, then spoon the blueberries over the top. Don’t stir. The oven does the layering for you, and that’s what creates the classic cobbler effect: crisp edges, soft middle, and fruit that settles into the cake as it bakes. If you stir, the butter disappears into the batter too early and you lose those browned edges.
Baking Until the Center Sets
Bake until the top is deep golden and the fruit is bubbling all the way around the edge and in the center. The middle should look set, not wet, when you give the pan a gentle shake. If the top browns before the filling bubbles, the oven is running hot; loosely cover it with foil for the last few minutes. Let it rest at least 10 minutes before serving so the juices thicken instead of running everywhere.
Three Practical Ways to Bend This Cobbler to Your Pantry
Make it dairy-free without losing the buttery edges
Use plant-based butter and full-fat oat milk. Oat milk gives the batter more body than almond milk, which tends to bake up thinner and less plush. The crust won’t taste exactly like classic buttered cobbler, but it will still brown well and stay tender.
Swap in other fruit when blueberries aren’t the star
Blackberries, raspberries, or a mix of berries work with the same method. Strawberries should be cut smaller so they soften at the same rate as the batter bakes. If the fruit is especially juicy, add a tablespoon of flour or cornstarch to the filling so it thickens into sauce instead of pooling.
Make it a little less sweet
Cut the sugar in the filling by a couple of tablespoons if your berries are already very sweet and ripe. Don’t slash the batter sugar too aggressively, though, because that sugar helps the crust brown. If you want a more dessert-forward cobbler, serve it with vanilla ice cream; if you want it sharper, use lightly sweetened whipped cream.
Storage and Reheating
- Refrigerator: Store covered for up to 4 days. The topping softens as it sits, but the flavor stays good.
- Freezer: It freezes well after baking. Cool completely, wrap tightly, and freeze for up to 2 months. Thaw in the fridge before reheating.
- Reheating: Warm in a 325°F oven until the filling is hot and the top re-crispens a bit, usually 15 to 20 minutes. The microwave works for a quick bowl, but it softens the crust, so the oven is the better choice.
Answers to the Questions Worth Asking
Easy Blueberry Cobbler
Ingredients
Equipment
Method
- Preheat your oven to 375°F (190°C). Pour the melted butter into a 9x13-inch baking dish so it coats the bottom.
- In a bowl, toss the blueberries with 1/4 cup sugar, lemon juice, and lemon zest. Set aside while you prepare the batter.
- In a separate bowl, whisk together the flour, remaining 1/2 cup sugar, baking powder, and salt. This should look evenly combined with no dry pockets.
- Add the milk and vanilla to the dry ingredients and stir until just combined. Stop as soon as no dry flour remains—do not overmix.
- Pour the batter evenly over the melted butter in the baking dish. Do not stir so the butter stays on the bottom for a tender topping.
- Spoon the blueberry mixture evenly over the batter. Do not stir, so the filling bakes up bubbling and jammy.
- Bake for 45–50 minutes at 375°F (190°C), until the top is golden brown and the edges are bubbling. Watch for a set, bubbly filling around the sides.
- Remove from the oven and let rest for 10 minutes before serving. The cobbler will thicken slightly as it cools.
- Serve warm with ice cream or whipped cream. Spoon it out while the filling is still hot and glossy.