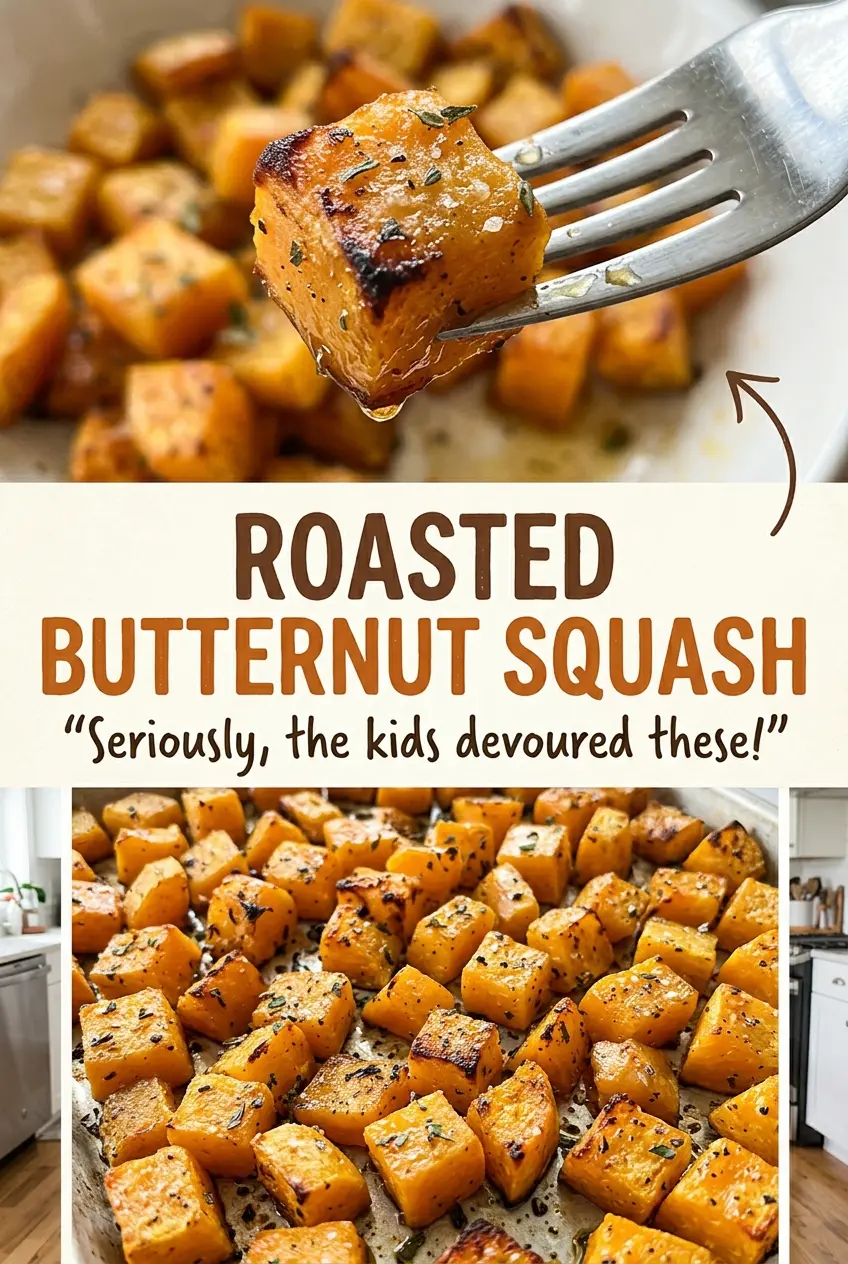
The squash starts to smell nutty before you see much color, and that’s usually when I’m tempted to pull the pan too soon. Give the edges time to brown: that’s where the sweetness concentrates, while the centers turn tender. I cut the squash into even cubes so they roast at about the same pace instead of leaving tiny pieces soft and larger ones stubbornly firm.
Roasted butternut squash needs little more than olive oil, salt, and pepper, but the way the pieces sit on the pan matters. Spread them in one layer rather than piling them together, then turn them once as they roast. The result is simple, savory squash with browned edges and soft centers—good straight from the pan, with no elaborate seasoning to cover it up.
Kitchen Note
Bake, Serve, Wear the Vibe 👕
Editor-picked tees our Oven To Fork readers love.



We may earn from qualifying purchases at no extra cost to you.
Keep the cubes close to the same size. The smaller pieces can turn soft before the larger ones are tender, so an even cut makes the whole pan finish together.
Save this roasted butternut squash for a simple side with tender centers and browned, sweet edges.
Why a Crowded Pan Makes Butternut Squash Pale
Butternut squash has plenty of moisture, and roasting needs room for that moisture to evaporate. When the cubes are piled together, they trap steam against one another instead of exposing their surfaces to the hot oven. You’ll still get tender squash, but the pieces are more likely to look pale and taste soft rather than sweet and browned at the edges.
Spread the cubes out in a single layer on the rimmed baking sheet. They don’t need a wide gap between every piece, but avoid stacking or letting one cube sit on top of another. Parchment keeps the squash from sticking, while the olive oil coats the surfaces; adding extra oil won’t solve crowding and can leave the pieces greasy. If the pan looks packed, rearrange the squash before it goes into the oven. That little bit of space is what lets the edges roast instead of steam.
What the Squash, Oil, and Pepper Bring to the Pan

- Butternut squash — A medium squash around two pounds gives you firm, sweet flesh that softens without disappearing on the pan. Choose one that feels firm and heavy for its size; there’s no need for a specialty variety. I don’t recommend swapping in a different squash here, since its moisture and texture can change how quickly the cubes soften.
- Olive oil — The oil helps the seasoning cling and keeps the exposed surfaces from drying out before the centers turn tender. An everyday olive oil is plenty; save an expensive finishing oil for a dish where its aroma stays uncooked. Coat the pieces evenly rather than pouring extra oil over the pan.
- Kosher salt — The larger crystals are easy to scatter over the cubes as you toss them. Salt brings out the squash’s natural sweetness rather than making the finished side taste salty. Because different salts vary in crystal size, stick with kosher salt for the listed measurement.
- Black pepper — Pepper gives the sweet squash a gentle savory edge. Freshly ground pepper has a brighter aroma, but ordinary pre-ground pepper works well in this short ingredient list. Scatter it over the squash with the salt so it doesn’t collect in one spot.
From Firm Squash to Browned, Tender Cubes
Peel, Halve, and Cut the Squash
Heat the oven to 425°F and line a rimmed baking sheet with parchment paper. Peel the squash, cut it in half lengthwise, and scoop out the seeds. Cut the flesh into 1-inch cubes, keeping the pieces as even as you can so they roast at a similar pace. If the squash feels awkward to handle, take your time with the knife rather than forcing a cut.
Coat the Pieces Without Overcrowding
Place the cubes on the prepared baking sheet, drizzle them with olive oil, and sprinkle on the kosher salt and black pepper. Toss until the surfaces have a light, even coating; dry patches won’t brown as readily as oiled ones. Spread everything into a single layer before roasting. A cube resting on another one is more likely to steam on the covered side.
Roast Until the Edges Pick Up Color
Roast for 25 to 35 minutes, turning the pieces halfway through. Look for browned edges and squash that’s tender when pierced, not just dark spots on the outside. If the largest cubes are still firm, give them more time within the roasting window and check again. Pull the pan once the centers are tender and the edges have taken on color.
Two Ways to Change the Shape or Texture
Cut Half-Moons for Broader Browned Surfaces
For a different shape, cut the peeled, seeded squash into even half-moon slices instead of cubes. Toss them with the same olive oil, salt, and pepper, arrange them in one layer, and roast at 425°F, turning halfway through. Because slices can be thinner than cubes, start checking for tenderness and browned edges at 25 minutes; the finished pieces will have a flatter, more browned face.
Mash the Roasted Cubes for a Soft Side
Roast the seasoned cubes as usual, then mash them with a fork while they’re hot. The result is more rustic than a smooth puree, with a little olive oil already worked through the squash. Mashing trades the browned cube-by-cube texture for a softer spoonable side, so leave a few small pieces intact if you like some bite.
Storage and Reheating
- Refrigerator: Store cooled squash in an airtight container for 3 to 4 days. The pieces soften as they sit, so they won’t keep the same just-roasted edges.
- Freezer: Freeze in an airtight container for up to 3 months. Thawed squash will be softer, which works especially well if you plan to mash it.
- Reheating: Warm the squash in the microwave in short bursts, stirring between them, or reheat it in the oven until hot. Avoid leaving it in the microwave too long at once; the edges can dry out before the center warms.
Questions That Come Up When Roasting Butternut Squash
Roasted Butternut Squash
Ingredients
Equipment
Method
- Heat the oven to 425°F.
- Line a rimmed baking sheet with parchment paper.
- Peel the squash, cut it in half lengthwise, and scoop out the seeds.
- Cut the squash into 1-inch cubes and place them on the baking sheet.
- Drizzle the squash with olive oil, sprinkle with kosher salt and black pepper, and toss to coat.
- Spread the squash into a single layer.
- Roast for 25 to 35 minutes, turning the pieces halfway through, until tender and browned at the edges.