These Red White and Blue Thumbprint Cookies bake up soft, buttery, and just a little nostalgic, with that classic cake-mix shortcut that keeps the dough easy to handle and the texture tender instead of dry. The jam centers add a bright pop of color and a sweet-tart bite that keeps each cookie from tasting one-note, which matters when you’re serving a platter full of them at a party.
The trick is pressing the wells deep enough before baking and then touching them up the second they come out of the oven if the centers puff back in. That quick re-press is what gives you room for the jam or frosting without the filling spilling over the sides. A white cake mix gives the cleanest color and the most neutral base, but vanilla works too if that’s what you have.
Below, I’ve included the small details that keep the cookies soft in the middle, along with a few smart variations if you want to swap fillings or make the colors a little more dramatic.
Bake, Serve, Wear the Vibe 👕
Editor-picked tees our Oven To Fork readers love.


We may earn from qualifying purchases at no extra cost to you.
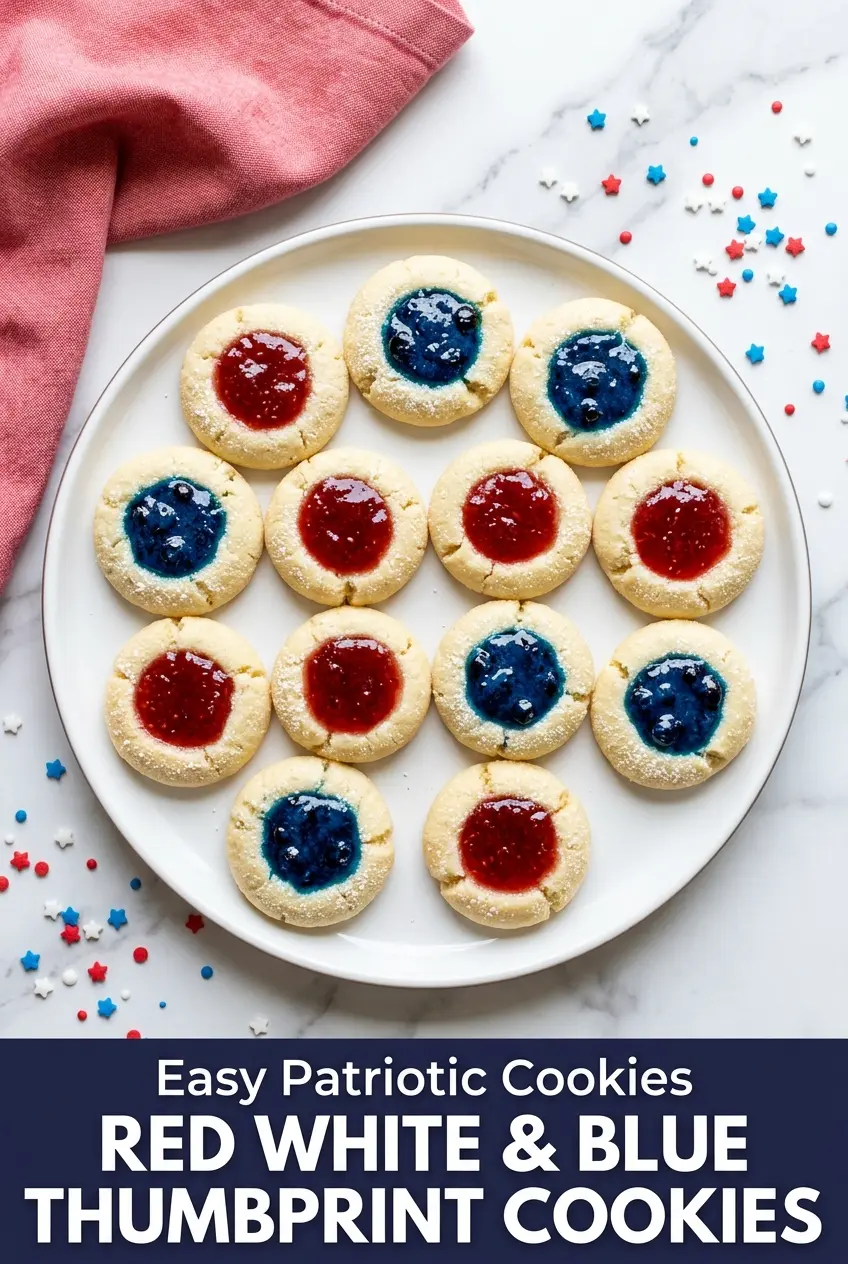
The wells held their shape after I re-pressed them, and the red jam stayed put instead of running all over the pan. I took them to our block party and they were the first dessert gone.
These red, white, and blue thumbprint cookies disappear fast, so save the jam-filled version for your next patriotic dessert tray.
The Thumbprint Trick That Keeps the Filling from Overflowing
The filling problem starts before the cookies ever hit the oven. If the indentation is shallow, the dough puffs up and pushes the jam out to the edges, which leaves you with a sticky rim and no real center. Press the wells deeper than you think you need, then give them one quick re-press as soon as the cookies come out while the dough is still soft. That second press is what keeps the shape clean.
Cake mix dough is softer than a classic shortbread thumbprint, so it helps to use a rounded teaspoon or the back of a small measuring spoon instead of your fingertip if the dough feels warm. Warm dough spreads faster. If your kitchen is hot, chill the shaped dough for 10 minutes before baking so the cookies hold their shape better.
What Each Shortcut Ingredient Is Actually Doing Here

- White or vanilla cake mix — This gives you the soft, tender cookie base with almost no effort. White cake mix keeps the colors brightest, while vanilla adds a little more flavor depth. If you only have yellow cake mix, it works, but the cookie color will be warmer and a little less festive.
- Eggs and vegetable oil — These are what turn the dry mix into a pliable dough. Oil keeps the cookie soft for days, while the eggs add structure so the wells don’t collapse as badly in the oven. Don’t swap in melted butter unless you want a firmer cookie that spreads a bit more.
- Vanilla extract — Even in a shortcut dough, it matters. It rounds out the cake-mix flavor and keeps the cookie from tasting flat. Use pure vanilla if you can.
- Jam or frosting — Jam gives you a glossy center and a bright, tart finish, while frosting gives you a sweeter, more decorative look. Raspberry and strawberry both work well for the red centers because they’re thick enough to stay put. For the blue centers, a thick blueberry jam is easiest; if you use frosting, pipe it after the cookies cool completely so it doesn’t melt.
- Powdered sugar and sprinkles — These are optional, but they add contrast and a finished look. Powdered sugar is best added right before serving so it doesn’t disappear into the jam.
Getting the Shape, Bake, and Fill Just Right
Mixing the Dough Without Overworking It
Stir the cake mix, eggs, oil, and vanilla until the dough comes together and no dry pockets remain. It will look soft and a little sticky, which is exactly what you want. If you keep stirring once it’s combined, the cookies can bake up denser instead of tender. Let the dough sit for a couple of minutes if it feels too loose; the cake mix hydrates quickly.
Shaping the Wells
Roll the dough into even 1-inch balls so they bake at the same rate. Place them with space between them because they will spread a little. Press straight down in the center with your thumb or the back of a small spoon to make a deep, wide well. If the edges crack badly, smooth them gently with your fingers before baking.
Baking Until Just Set
Bake until the edges look set and the bottoms are just starting to turn light gold. The centers should still look soft when you pull the pan, because they finish setting as they cool. Overbaking is the fastest way to lose that soft thumbprint texture. If the cookies are on the dark side, the jam can taste too sweet and the edges get dry.
Filling and Finishing
Press the centers again right out of the oven if they puffed up at all, then let the cookies cool mostly before adding jam or frosting. Warm cookies will thin the filling and make it slide. A teaspoon is usually more filling than you need; half a teaspoon keeps the centers neat and lets the cookie hold together better on a platter.
Three Ways to Change the Colors Without Changing the Cookie
Dairy-Free and Still Soft
This recipe is already dairy-free if you use jam instead of frosting, which makes it an easy win for mixed diets. Skip the cream cheese glaze and dust with powdered sugar instead. The cookies keep their soft texture because the oil-based dough does the heavy lifting.
Gluten-Free With a Cake Mix Swap
Use a gluten-free white cake mix in the same amount and keep the rest of the ingredients the same. The dough may be a touch softer, so chill it for 15 minutes before shaping if needed. You’ll get a slightly more delicate cookie, but the jam centers still work perfectly.
All Jam, No Frosting
If you want a cleaner finish and less sweetness, use only strawberry and blueberry jam. That gives you the classic red and blue look with a brighter fruit flavor and no extra decorating step. A thicker jam works best because thin preserves can sink into the cookie as they sit.
Storage and Reheating
- Refrigerator: Store in an airtight container for up to 5 days. The cookies stay soft, though the jam centers may darken slightly.
- Freezer: Freeze the baked cookies without powdered sugar for up to 2 months. Layer with parchment so the fillings don’t stick together.
- Reheating: Let frozen cookies thaw at room temperature. If you want them slightly warm, 5 to 8 seconds in the microwave is enough; longer will make the jam run and soften the cookie too much.
Questions I Get Asked About This Recipe
Red White and Blue Thumbprint Cookies
Ingredients
Equipment
Method
- Preheat oven to 350°F and line two baking sheets with parchment paper.
- In a large bowl, combine cake mix, eggs, vegetable oil, and vanilla extract, then stir until a soft dough forms.
- Roll the dough into 1-inch balls and place them 2 inches apart on the prepared baking sheets.
- Press your thumb or a rounded teaspoon into the center of each dough ball to create a deep well.
- Bake for 10–12 minutes at 350°F, until the edges are just set and the bottoms are lightly golden; do not overbake.
- If the centers puff up as they bake, gently re-press the wells with the back of a small spoon immediately after removing from the oven.
- Cool the cookies on the baking sheet for 5 minutes, then transfer to a wire rack to cool completely for about 20 minutes.
- Fill half of the cookies with 1/2 tsp red jam and fill the other half with 1/2 tsp blue jam.
- Optionally, add a dot of white frosting to some cookies for full red-white-blue variety.
- Garnish with sprinkles if desired, then serve at room temperature or refrigerate until ready to serve.