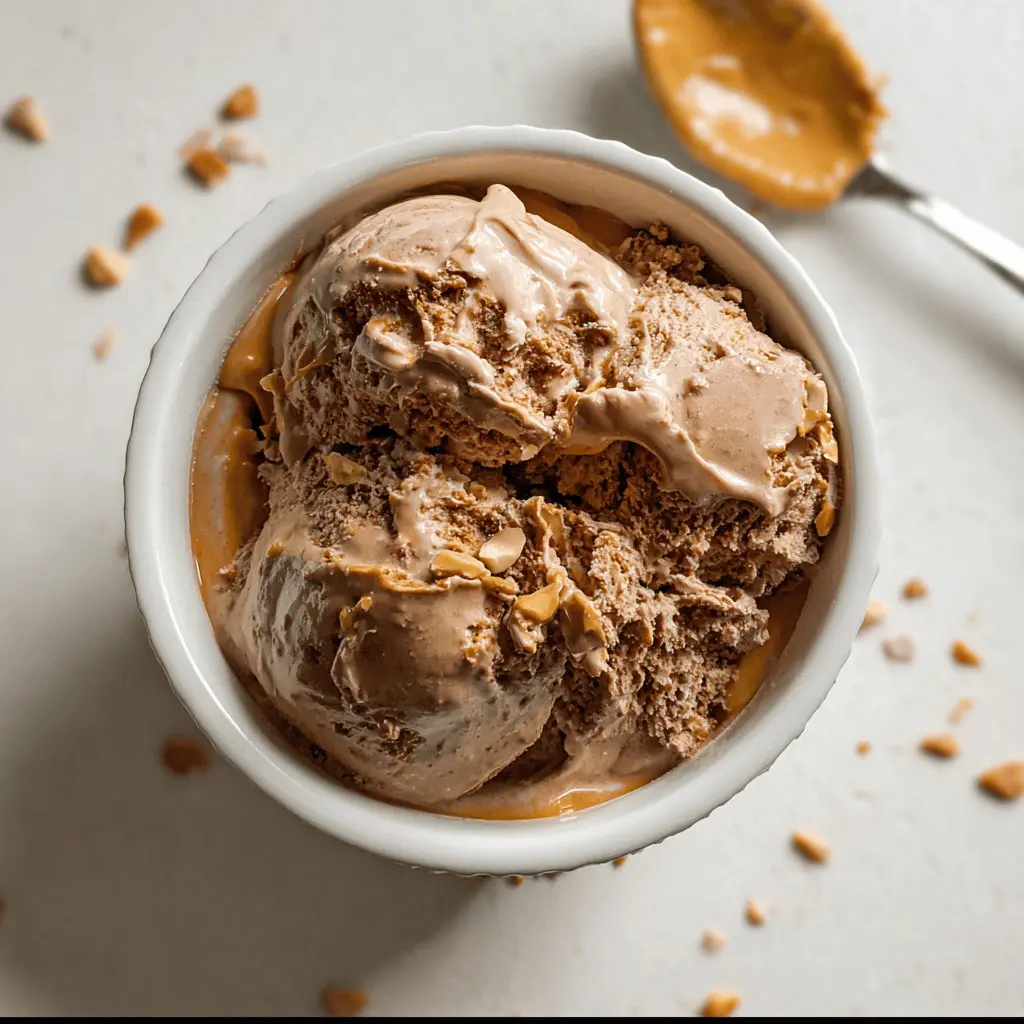
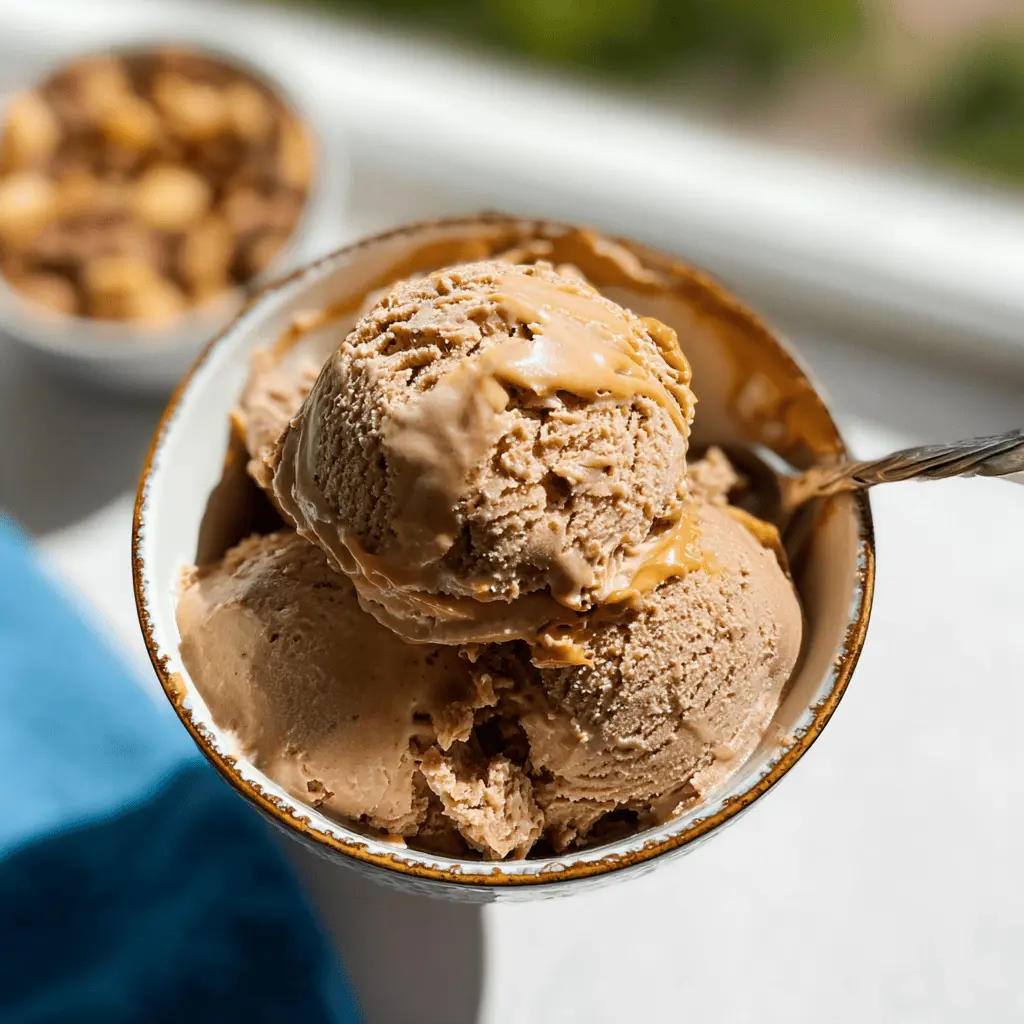
This Easy Ninja Creami Chocolate Peanut Butter Ice Cream is a rich and creamy treat that gives you all the chocolate and peanut butter goodness you crave! It’s super simple to whip up, too!
Who can resist the classic duo of chocolate and peanut butter? I often call this my “happy scoop” because it brightens my day! It’s perfect for hot days or any time you need a sweet pick-me-up.
All you need is a few ingredients, and the Ninja Creami does the hard work. I love serving it with some crushed nuts on top for that extra crunch—so fun and tasty!
Bake, Serve, Wear the Vibe 👕
Editor-picked tees our Oven To Fork readers love.


We may earn from qualifying purchases at no extra cost to you.
Key Ingredients & Substitutions
Whole Milk: Whole milk gives the ice cream a creamy texture. If you prefer a lighter option, you could use 2% milk, although it might be less creamy.
Heavy Cream: This adds richness to the ice cream. You can use half-and-half for a lighter version, but the texture won’t be as rich and creamy.
Granulated Sugar: Sugar sweetens your ice cream. You can substitute it with coconut sugar or a sugar alternative like stevia, just adjust the amount based on the sweetness available.
Unsweetened Cocoa Powder: This gives the chocolate flavor. If you like dark chocolate, try using Dutch-processed cocoa for a richer taste. Otherwise, use regular cocoa powder for a milder flavor.
Pure Vanilla Extract: This enhances the flavor of the chocolate and peanut butter. You can use vanilla bean paste or scrape seeds from a vanilla pod if you want a more intense flavor.
Creamy Peanut Butter: I recommend a good-quality creamy peanut butter for smoothness. If you want a crunchy texture, you could use chunky peanut butter instead!
How Can I Ensure My Ice Cream is Smooth and Creamy?
Getting that perfect creamy texture is key to delicious ice cream. After mixing your ingredients, it’s crucial to freeze the mixture properly. Make sure to freeze it for a full 24 hours to ensure a solid base.
- When processing in the Ninja Creami, use the “Ice Cream” function first. If it seems crumbly, don’t worry! Just re-spin it for a smoother consistency. This step helps incorporate air, making it fluffier.
- Remember to let the ice cream sit at room temperature for a few minutes before serving if it’s too hard, this makes it easier to scoop. Enjoy your delicious creation!
Easy Ninja Creami Chocolate Peanut Butter Ice Cream
Ingredients You’ll Need:
- 2 cups whole milk
- 1 cup heavy cream
- 3/4 cup granulated sugar
- 1/2 cup unsweetened cocoa powder
- 1 teaspoon pure vanilla extract
- 1/2 cup creamy peanut butter (plus extra for drizzling)
- Optional toppings: chopped peanuts or granola for crunch
How Much Time Will You Need?
This delicious chocolate peanut butter ice cream takes about 10 minutes of active prep time. However, it needs to freeze for at least 24 hours before you can enjoy it. So, plan ahead and make it a day before your ice cream cravings kick in!
Step-by-Step Instructions:
1. Combine the Dry Ingredients:
In a medium mixing bowl, add the granulated sugar and unsweetened cocoa powder. Whisk them together until well combined. This helps to evenly distribute the cocoa, ensuring every bite is full of chocolatey goodness!
2. Mix in the Wet Ingredients:
Pour in the whole milk and heavy cream. Keep whisking until everything is fully dissolved and smooth. Make sure there are no lumps from the cocoa powder—you want a silky ice cream base! Lastly, stir in the pure vanilla extract and creamy peanut butter until everything is well blended.
3. Prepare for Freezing:
Now, transfer your smooth mixture into the Ninja Creami pint container. Seal it tightly with the lid, then place it flat in the freezer. Let it freeze for a minimum of 24 hours to ensure it’s completely solid.
4. Blend in the Ninja Creami:
Once frozen, take the pint out of the freezer and remove the lid. Place the frozen pint into the Ninja Creami machine, following the manufacturer’s instructions. Select the “Ice Cream” function to process the mixture into creamy perfection.
5. Serve and Enjoy:
If the ice cream comes out crumbly, no worries! Just use the “Re-spin” function until you achieve that smooth and creamy texture. Once ready, scoop the chocolate peanut butter ice cream into your favorite bowls. For an indulgent touch, drizzle some extra peanut butter on top and sprinkle with chopped peanuts or granola for that perfect crunch!
Dig in and enjoy your homemade Easy Ninja Creami Chocolate Peanut Butter Ice Cream!
FAQ about Easy Ninja Creami Chocolate Peanut Butter Ice Cream
Can I Use Low-Fat Milk Instead of Whole Milk?
Yes, you can use low-fat milk, but keep in mind that it may affect the creaminess of the ice cream. For the best texture, whole milk or even 2% is recommended.
How Do I Store Leftover Ice Cream?
Store any leftover ice cream in an airtight container and keep it in the freezer. It can last for up to 2 weeks. Let it sit at room temperature for a few minutes to soften before scooping, as homemade ice cream can become quite hard in the freezer.
Can I Make This Recipe Vegan?
Absolutely! Substitute whole milk and heavy cream with a plant-based milk (like almond or coconut milk) and use a vegan cream substitute. For the peanut butter, ensure it’s vegan-friendly as well.
What Should I Do If My Ice Cream Comes Out Crumbly?
If your ice cream is crumbly after processing, simply use the “Re-spin” function on your Ninja Creami to achieve a smoother texture. You can also let it sit at room temperature for a few minutes to soften before re-blending.