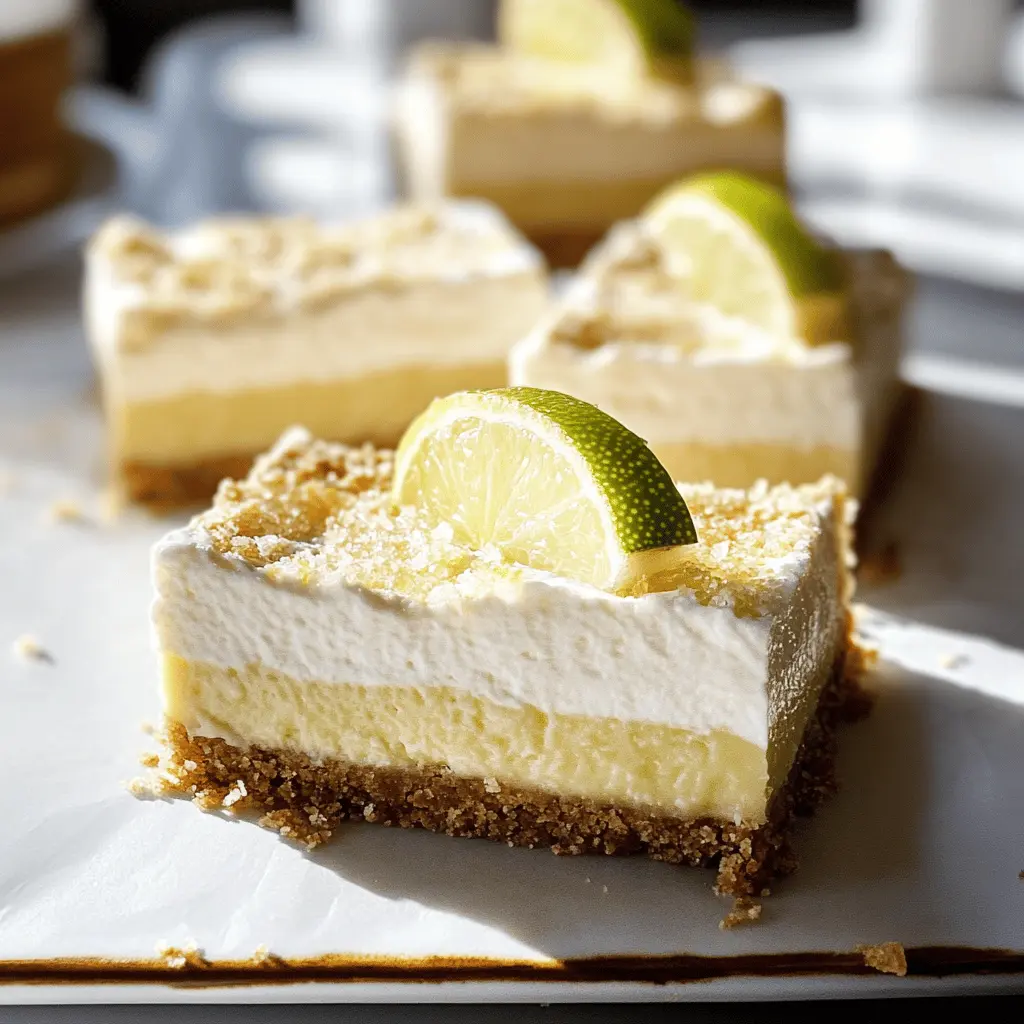
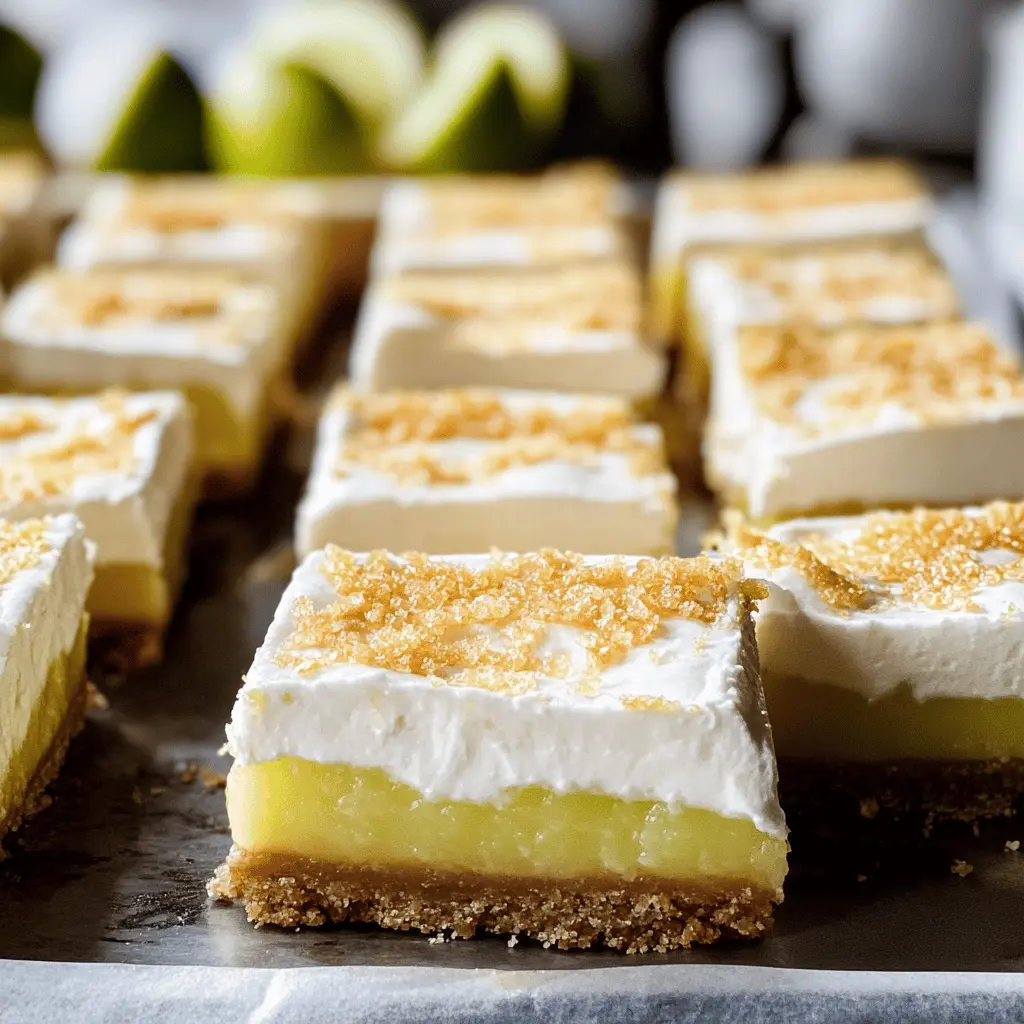
These Key Lime Pie Bars are a perfect treat for lime lovers! With a tangy filling and a crumbly crust, they’re refreshing and easy to make. Each bite is like a little piece of sunshine!
Honestly, I can eat these bars anytime. They’re sweet, tart, and just the right amount of creamy. I love having a slice after dinner while dreaming of warm beaches! 🌴
Ingredients & Substitutions
Graham Cracker Crumbs: These crumbs are the base of your crust. If you don’t have them, try using crushed digestive biscuits or vanilla wafers for a different flavor.
Bake, Serve, Wear the Vibe 👕
Editor-picked tees our Oven To Fork readers love.


We may earn from qualifying purchases at no extra cost to you.
Sour Cream: For a tangy filling, sour cream is perfect. You can substitute it with Greek yogurt if you want a lower-fat option while still achieving creaminess.
Key Lime Juice: While fresh key limes are great, regular limes or bottled key lime juice work too. Just remember, fresh juice gives the best flavor!
Heavy Whipping Cream: If you’re out of heavy cream, you can use coconut cream for a dairy-free version. It will add a subtle coconut flavor as an extra bonus!
How Do I Get the Filling to Set Perfectly?
Getting the key lime filling to set just right can sometimes be tricky. Follow these steps for the best results:
- Make sure you mix the filling until it’s smooth and well combined. This helps create an even texture.
- When you pour the filling over the crust, spread it out evenly to ensure it sets uniformly.
- Bake until just set. Don’t worry if the center still has a slight jiggle – it will firm up as it cools!
Be patient and let it chill in the fridge for at least 4 hours. A longer chill also enhances the flavors and makes it extra refreshing.
How to Make Key Lime Pie Bars
Ingredients You’ll Need:
For The Crust:
- 1 1/2 cups graham cracker crumbs
- 1/3 cup granulated sugar
- 1/2 cup unsalted butter, melted
For The Filling:
- 2 (14-ounce) cans sweetened condensed milk
- 1/2 cup sour cream
- 1/2 cup key lime juice (freshly squeezed preferred)
- Zest of 2 limes
For The Topping:
- 1 cup heavy whipping cream
- 1/4 cup powdered sugar
- Zest of 1 lime for garnish
How Much Time Will You Need?
This recipe takes about 15 minutes of prep time, plus 10 minutes to bake the crust, an additional 15 minutes to bake the filling, and 4 hours of chill time in the refrigerator. In total, you’ll need around 4 hours and 40 minutes to enjoy your delicious bars!
Step-by-Step Instructions:
1. Prepare the Crust:
Start by preheating your oven to 350°F (175°C). While it’s heating, grease a 9×9-inch baking dish or line it with parchment paper for simple removal later. In a mixing bowl, combine the graham cracker crumbs, granulated sugar, and melted butter. Mix everything together until the crumbs are evenly coated and look like wet sand. Press this mixture firmly into the bottom of your baking dish to create a nice, solid crust.
2. Bake the Crust:
Pop the crust into your preheated oven and bake for about 10 minutes or until it turns lightly golden brown. Once done, take it out of the oven and let it cool for a bit.
3. Make the Key Lime Filling:
In another bowl, whisk together the sweetened condensed milk, sour cream, key lime juice, and lime zest. Keep whisking until the mixture is smooth and well combined. Pour the delicious key lime filling over the cooled crust, making sure to spread it evenly. Bake this in the oven for another 15 minutes, just until the filling is set. When ready, remove it from the oven and let it cool to room temperature. After it has cooled, refrigerate it for at least 4 hours (or longer) to chill completely.
4. Prepare the Topping:
After your key lime bars have chilled, it’s time for the topping! In a mixing bowl, beat the heavy whipping cream and powdered sugar together until stiff peaks form. Be careful not to overbeat! Spread this whipped cream evenly over the chilled key lime filling. If you like, you can add some extra lime zest on top for a beautiful garnish.
5. Serve and Enjoy:
Now comes the fun part! Cut the key lime pie bars into squares and serve chilled. Enjoy every tasty bite of your homemade key lime pie bars—perfect for any occasion!
Can I Use Regular Limes Instead of Key Limes?
Yes, you can use regular limes if key limes aren’t available. The flavor will be slightly different but still delicious! Just remember to adjust the amount of juice to taste, as regular limes can be juicier and more tart.
How Should I Store Leftover Key Lime Pie Bars?
Store any leftovers in an airtight container in the fridge for up to 3 days. Make sure to cover the bars with plastic wrap or foil to keep them fresh. They can also be frozen for longer storage; just thaw them in the fridge before serving.
Can I Make These Bars Gluten-Free?
Absolutely! Use gluten-free graham crackers or crushed nuts as a substitute for the crust. Just make sure any other ingredients (like the sweetened condensed milk) are certified gluten-free as well!
What Can I Substitute for Sour Cream?
If you don’t have sour cream, you can use Greek yogurt or a dairy-free yogurt alternative. The texture will be similar, and it will still provide that creamy richness in the filling.